When it comes to designing a functional and stylish home, choosing the right switch for each room is often overlooked. Selecting the appropriate on/off switch is more than just a practical choice—it affects convenience, safety, and the overall aesthetic of your space. This guide will walk you through everything you need to know to choose the perfect switch for every room in your house, ensuring both functionality and style.
Why Choosing the Right Switch Matters
Many homeowners focus on lighting fixtures but neglect the importance of switches. A well-chosen switch can:
- Enhance convenience and usability
- Complement the design of your room
- Improve safety by reducing electrical hazards
- Support smart home integration for modern living
By carefully selecting switches, you ensure that each room functions efficiently while maintaining a polished appearance. In addition, the right switch can add subtle elegance to your space, complementing your furniture, wall colors, and even flooring choices.
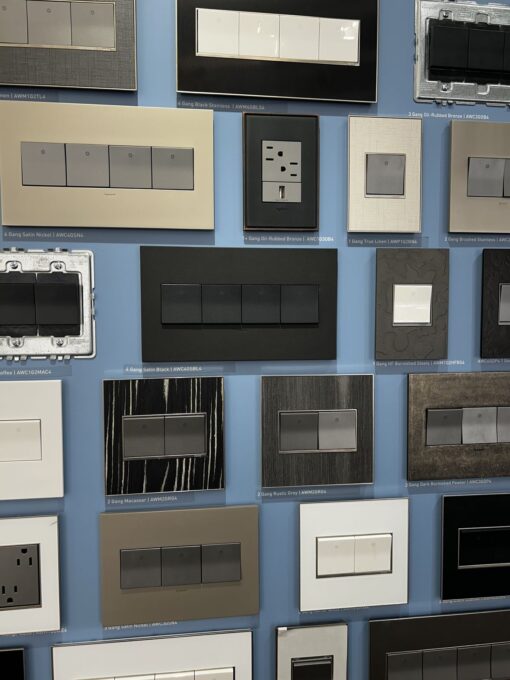
Types of Switches to Consider
Before deciding on the perfect switch, it’s essential to understand the types available. Each type has unique advantages depending on the room’s use.
1. Toggle Switches
Toggle switches are the classic choice. They are simple, durable, and suitable for most rooms, including hallways and bedrooms.
Pros:
- Easy to operate
- Durable
- Cost-effective
Cons:
- Limited aesthetic appeal
- Less suited for modern décor
2. Rocker Switches
Rocker switches are sleek and modern, providing a larger surface for easier operation. They work well in living rooms, kitchens, and offices.
Pros:
- Modern design
- Smooth operation
- Compatible with dimmers
Cons:
- Slightly more expensive
- Less traditional look
3. Dimmer Switches
Dimmer switches allow you to adjust the brightness of your lights, perfect for creating ambiance in living rooms, dining areas, or bedrooms.
Pros:
- Control lighting intensity
- Save energy
- Enhance room mood
Cons:
- Higher installation cost
- Not all bulbs are compatible
4. Smart Switches
Smart switches integrate with home automation systems, enabling control via apps or voice assistants. Ideal for tech-savvy homeowners.
Pros:
- Remote control
- Scheduling and automation
- Energy-efficient
Cons:
- More expensive
- Requires Wi-Fi
By understanding these switch types, you can choose the one that best suits each room’s function and your lifestyle, ensuring convenience, safety, and style.
Step 1: Assess Each Room’s Function
The first step in choosing the right switch is evaluating the purpose of each room:
- Kitchen: Requires accessible, easy-to-clean switches
- Bathroom: Should be moisture-resistant and safe
- Bedroom: Consider dimmers for relaxing lighting
- Living Room: Combine aesthetics with functional controls for multiple light sources
- Hallways and Staircases: Prioritize safety and visibility
Understanding each room’s function helps determine which switch type is most suitable. Remember, what works for a living room may not be practical in a bathroom or kitchen.
Step 2: Safety Considerations
Electrical safety is critical when choosing switches. Keep these tips in mind:
- Ensure switches meet local electrical codes
- Use moisture-resistant switches in bathrooms and kitchens
- Avoid overloading circuits
- Consider childproof switches in homes with young children
💡 Tip: Combining safety with design ensures both functionality and peace of mind. Always check for certifications and proper installation guidelines before selecting a switch.
Step 3: Style and Aesthetics
Switches don’t have to be purely functional—they can complement your décor. Consider:
- Color: White, black, or metallic finishes to match walls or fixtures
- Shape: Square, rectangular, or custom designs
- Material: Plastic, metal, or wood for rustic or modern vibes
A coordinated look enhances the room’s overall feel without overwhelming other design elements. Switches can subtly reinforce your interior design style, from contemporary minimalism to classic elegance.
Step 4: Accessibility and Convenience
Switch placement is crucial for usability:
- Position switches near entrances for easy access
- Consider multiple switches for large rooms
- Install switches at a comfortable height for all household members
Accessibility improves daily living and ensures everyone can use your lighting easily. In multi-level homes, placing switches at the top and bottom of staircases adds extra safety.
Step 5: Energy Efficiency
Modern homes often aim for energy efficiency. The right switch can contribute significantly:
- Use dimmer switches to reduce energy consumption
- Smart switches can schedule lights to turn off automatically
- Motion sensor switches are ideal for hallways and closets
Efficient switches save electricity and reduce monthly bills. Additionally, combining energy-efficient bulbs with smart or dimmer switches amplifies savings.
Step 6: Consider Lighting Zones
Large spaces may have multiple lighting zones. Choose switches that allow independent control of each zone:
- Living rooms: Separate controls for overhead lights, accent lights, and lamps
- Kitchens: Counter lighting and ceiling lights on separate switches
- Bathrooms: Mirror lights and main lights on separate circuits
Proper zoning improves both function and comfort. This also allows for tailored lighting scenes for reading, dining, or relaxing.
Step 7: Smart Home Integration
If you’re planning a smart home, select switches compatible with your system:
- Amazon Alexa, Google Home, or Apple HomeKit
- Wi-Fi or Bluetooth connectivity
- App control for convenience and automation
Smart switches enhance modern living and allow energy-saving routines. Some models even track energy consumption, helping homeowners understand usage patterns.
Step 8: Installation Tips
Correct installation ensures safety and longevity:
- Turn off the power at the circuit breaker before installing
- Use a voltage tester to confirm wires are safe
- Follow manufacturer instructions carefully
- When in doubt, hire a certified electrician
Proper installation is essential for both safety and performance. A professional can also advise on compatible switches for your existing wiring.
Step 9: Common Mistakes to Avoid
Many homeowners make errors when selecting switches:
- Choosing purely for aesthetics without considering function
- Ignoring compatibility with existing lighting systems
- Overlooking safety in moisture-prone areas
- Failing to plan for multiple zones in large rooms
Avoiding these mistakes ensures a functional and stylish result. Always plan ahead to avoid costly replacements or safety hazards.
Step 10: Budget Considerations
Switches range from inexpensive to high-end. Keep these points in mind:
- Basic toggle switches are affordable and practical
- Smart switches are more costly but offer convenience and efficiency
- Factor in installation costs and potential future upgrades
Investing wisely in switches enhances your home’s usability and long-term value. Prioritize critical areas first, then upgrade as needed.
Step 11: Case Studies and Room Examples
Living Room
- Use rocker switches or smart dimmers
- Multiple zones: overhead lights, lamps, accent lighting
- Combine aesthetics with functionality
Kitchen
- Waterproof rocker switches
- Easy-to-clean surfaces
- Consider motion sensors for under-cabinet lighting
Bathroom
- Moisture-resistant toggle or smart switches
- Consider backlit switches for nighttime visibility
- Integrate with extractor fans or vanity lights
Bedroom
- Dimmers for bedside lighting
- Smart switches for schedules and remote control
- Minimalist design to match décor
Hallways and Staircases
- Motion-sensor switches for safety
- Toggle or rocker switches at both ends of long corridors
- Consistent design throughout
- Internal and External Resources
- Learn more about home lighting and switches
- For smart switch integration tips, visit CNET Smart Home Guide
- DIY installation and safety tips:
💡 Internal Links Ideas:
- “Best Smart Home Lighting Ideas”
- “DIY Electrical Upgrades for Beginners”
Final Thoughts
Choosing the right switch for each room combines practicality, safety, style, and technology. By evaluating each room’s function, considering aesthetics, and exploring smart options, you can enhance the look and functionality of your home. With proper planning and careful selection, your switches become more than just functional—they elevate your entire living experience. Additionally, thoughtful switch placement and design can make your home feel modern, convenient, and safe for everyone